A short tutorial on creating personal designs for chine collé print techniques.
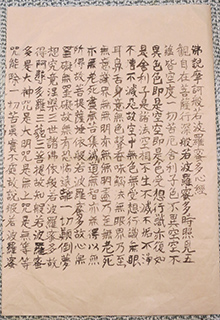 I acquired a single sheet of lightweight printed paper which I wish to incorporate in my latest print project (anyone know what this actually says?). However, knowing that I can’t replace it, or am unlikely to source anything similar within the near future, I decided to try to replicate it – with a few modifications.
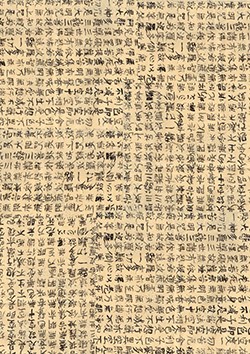 I scanned it into Photoshop, duplicated, reversed, resized and rotated it – altering the colour a little.
As I intended printing it I kept a good resolution rather than reducing it to 72dpi as per web images. Pretty happy with this.
I ran a couple of tests on plain paper, reducing the image to 85% to create a border.
Chine collé (the art of adding collage into a print during the actual print process – to be fully covered in a later post) usually uses very lightweight paper such as Japanese washi, tissue, Unryu, fine Kozo and such like. Specific papers are available to purchase from good stationers or art supply stores. I wanted an option where I could add my own design to a plain surface, so out came some regular tissue paper from my extensive collection, which includes many colours.
These days we know a lot more about paper, the make-up and the archival properties. In theory I should be using acid free tissue but I’m not that particular. I don’t need my project to be archival quality. My tissue might be acid-free but it might not. I chose a light beige colour and ironed the sheet completely flat – an essential step. Putting tissue paper through a computer printer requires a ‘carrier sheet’. This is a more sturdy paper that carries the tissue through with it, enabling it to receive the print.
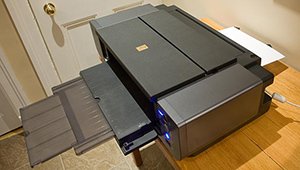 Best case scenario: use a flat feed printer – that is a printer where the paper is fed through the back of the printer and comes out the front without folding around a roller. There is much less likelihood of paper jamming the equipment with this method.
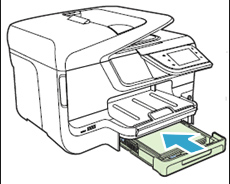 Worse case scenario (my case) use a front feed printer where the paper is loaded into a front cartridge, travels through the machine, around the print roller and comes back out on a front tray. Not great for carrier papers – but possible, with patience.
I cut my tissue paper a little narrower than A4 width as I was using A4 photocopy paper as my carrier and I wanted to ensure there was no pulling or catching of the tissue edges as it went through.
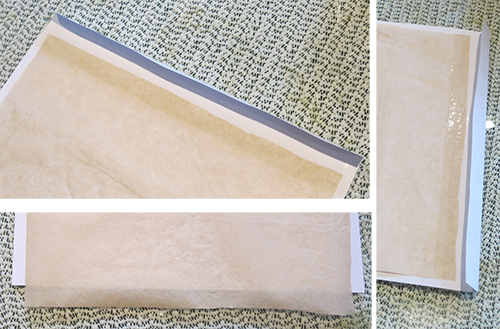 I folded the top edge of the carrier paper (photocopy paper) over and sellotaped the tissue just below this, as shown. I left the tissue slightly longer than the now reduced length carrier sheet to mop up any excess ink that may stray to the base. Why does this happen? Well occasionally the tissue creases slightly and the ink ‘pools’ then drags down the sheet. It’s nice to capture it on the paper rather than have it on the print roller.
As my printer is a front (roller) feed my paper is positioned in the cartridge tissue side down (adjust for back flat feed printers) with the folded ‘lip’ feeding through first. This avoids having a raw sellotape edge or two layers of paper edging getting caught as it feeds through. Works very well.
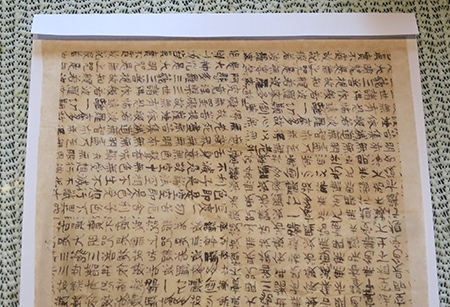 The result is fantastic but there are a few other things to consider:
- If your printer has a print speed adjustment set it to print slowly as it reduces the possibility of catching and creasing.
- When you come to use the prepared chine collé consider whether your computer printer ink is colour fast – mine is, I use Epson Durabrite inks. You risk the design running and spoiling when applying some of the recommended glues to the back of the paper if you haven’t taken this into account. As the paper used is quite fragile the glue can easily migrate through and ruin all your work.
- When using a front feed printer you need to allow for quite a few failures. I am working at a rate of about 50% unusable, torn or jammed sheets.
- Be aware that you will need to access all parts of the printer (so if it is in a corner against a wall it could be a problem) because you will, undoubtedly, have to open it up and remove jams from time to time.
- Another method of doing this is to use freezer paper as a carrier sheet and iron your tissue (or similar) on to this. It feeds through well, is reusable and the tissue remains flat with no possible creasing. Why didn’t I use this method? My tissue would not adhere to my freezer paper today – it must have some kind of resistant coating.
And finally, why bother doing this at all?
- Because it’s a challenge.
- I want to design and use unique patterns on my collage papers.
- And, simply, because I can.
So it can be a pain in the backside, time-consuming and frustrating but at the end of the day it’s resulted in a big personal achievement. Honestly, why do things the easy way when you can add fun complexities? Now let’s start using it.

Wow! Great explanation and I applaud your patience. The final effect is, as you say, fantastic. Afraid I can’t translate it but would like to think it says something to do with patience and stamina gaining great rewards.
ahhh…..stamina. Yes, that’s the word I was looking for.
Stamina, patience, lots of cups of tea and a large slab of cake!
Thanks for reading, and enjoy.
I’ve been considering this (we have a front feed laser) so it’s good to know that failed sheets are the norm and not a sign to give up!
Hi Pia, I wouldn’t recommend it if you have a printer that you desperately need for work the next day, just in case you really get a horrid jam and break the machine. I managed 7 prints out of 13 attempts, cleaned the heads twice and tried trimming paper edges to help feeding (which was successful). Luckily I found the ‘slow’ print setting so I was able to cancel the print each time it started to jam. Had fun though!!
Yes, maybe I should look for the pause/cancel button before I begin!
Are you using an inkjet or lazer printer?
Oh sorry, what a dummy, I forgot to say. I’m using an Epson inkjet.
Pingback: Chine collé – The final outcome | TactualTextiles