8 months ago I started the OCA course Printmaking 1. It has been 8 months of unrewarding difficulty, constant print problems, severe and extended angst and a loss of confidence, motivation and drive. I’m not satisfied with much of the printing I’ve done to date and have been unable to understand where I’m going wrong. I’ve contacted my tutor twice for help, once for each assignment, and she has done the best she can in a situation whereby she is halfway across the globe from me.
Being a textiles person, with little or no printing experience in the way OCA expects, some of the challenges have been insurmountable and I’ve had to leave ideas and projects behind and move on. The design aspect of my coursework has suffered immensely due to the knots and tangles in my brain just coping with the application of product to paper.
I hesitantly signed up for a 2 day monotype printing Masterclass in the hope of gaining some insight into my problems. This I attended a few days ago. The tutor, Tony (full review later), was exceptional and my fellow students were gracious in their tolerance of a novice hovering in their midst.
So what did I learn? And what can I pass on to my fellow OCA classmates who might be experiencing similar issues? Some of the things listed below may be obvious to many of you, but they weren’t to me.
 Paints vs Inks: Throughout this course I’ve alternated between using the words ‘oil paints’ and ‘oil inks’. I wasn’t aware there is a real difference between them.
Paints have a high oil content and lower pigment ratio than oil based inks. Oil paints can sometimes be used in printing, monoprints work quite well but they don’t have the richness and stickiness of oil inks. These paints cannot be used very successfully for lino printing as you need the higher viscosity and pigment ratio of the inks to adhere to the lino surface.
Luckily I have the correct inks, so my start point is on the right track.
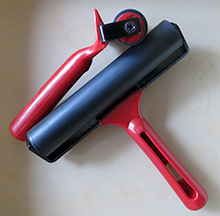 Rollers: There are many on the market and I investigated quite a few this week. Today I can laugh at the horror I encountered when I described what I was using. “No, no, no, those are for kids!” was the comment from Tony and two good art shops.
There’s a science to rollers. It is preferable to have ones with a metal core tube around which the rubber is formed, not plastic. This stops ‘bowing’ of the roller over time – this means the outer edges of the roller will deposit ink well whilst the middle point skims the paper surface, or misses it altogether, and so you cannot roll evenly. In addition to this issue, using rollers with plastic end plugs, where the metal screws attach (see photo) is not wise. The continual pressure applied to the roller flattens and distorts the plastic insert screw thread, creating a looseness to the roller and unstable rolling. The rubber on these rollers is not really thick enough and the quality is not there either.
OK, time to buy better quality rollers. These can cost many hundreds of dollars but I’ve found one that is artist quality and not designed to break the bank. Just waiting for the postman.
 Ink Viscosity: My ink supplier told me I should thin my inks with vegetable oil and clean up with the same. What a mistake. In fact, 8 months of mistake. It’s gutting that I’ve been doing this.
Plate oil is burnt linseed oil and comes in different weights. It is designed to be added, cautiously, to oil based inks to thin them. I’ve now ordered 000 which is a very lightweight (liquid) product and 02 which is heavier.
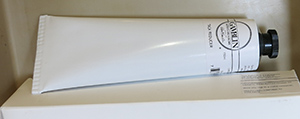 Tack reducer does what its name implies. It looks like a gel, is squeezed out of a tube and is added to the inks to reduce tackiness without thinning to the extent that plate oil does. I’ve now purchased this.
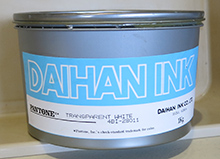 Extender medium is a gluey looking substance, creamy beige in colour, which does not thin the inks at all. It is designed to make the inks more translucent. During the workshop we tried using 75% extender to 25% black ink then, once printed, we overprinted with thinned yellow. With the reduced colour strength of the black the yellow was able to transform the overlaid surface into a very dark green/black. Very effective. I already use this product but not effectively enough. Interestingly, the brand I have describes itself as transparent white and not extender.
 At the other end of the scale there is magnesium carbonate.
This powder can be carefully mixed into inks to thicken them. Why would you need to do this? I have a couple of Windsor & Newton oil colours in tubes, it’s not specified if they are inks or paints – I suspect paints. They are a little more fluid than my Gamblin inks and will need to be thickened to provide solid print coverage.
I’ve now purchased this.
 Clean-up: As instructed, I’ve been using vegetable oil as my main cleaning product. Then I later degrease using liquid soap and water. It seems to have been working quite well. In the workshop I was introduced to Baby Oil, as an alternative to vegetable oil, and I liked it. It seems a lot less sticky and speeds up cleaning.
However, Gamsol was also available and so we gave it a try. The tin states that it is a great odor-free clean-up solvent for brayers, ink knives, plates and palettes. It evaporates completely, leaving no residue. I would agree and also add that it is non-sticky, easy to wipe surfaces and cleaner to use than vegetable oil.
This morning I re-cleaned all my CLEAN glass and print plates with the Gamsol I’ve bought and was staggered at how much unseen ink colour was removed.
- Preparing ink for printing: I have been placing my ink in a line with my palette knife and then using the roller to form a rectangular inked area which I then use to transfer ink to my print plate. The most common but not the best method it seems.
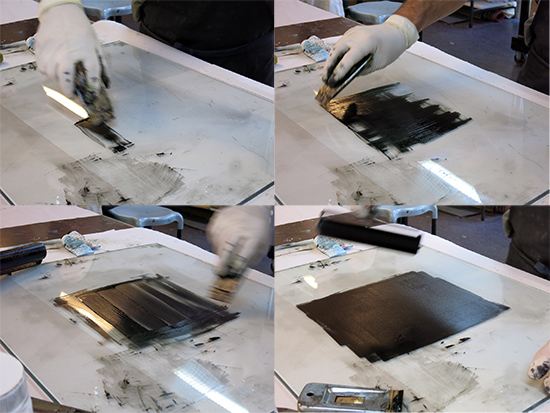 I was shown how to pick up the ink using a paint scraper with blade, then apply it to my glass surface in ‘ribbons’ before using the roller to smooth the ink out. By doing this only a very thin layer of ink is deposited on the glass, the excess remains on the scraper, and you avoid overloading the roller. The roller should make a light swishing sound as it travels across the ink, not a sticky hot asphalt sound (which is what I’ve been getting).
I also learned how to apply the ink to my lino or print plate in a better way, which is a lot more subtle than what I have been doing to date. I’ve got my paint scraper and am ready to try it.
- Printing paper: I’m not going into this as it is a massive subject on its own. Suffice it to say that I will now refine my choices and I understand the need for dampening paper or not, as the case may be. Tony is a qualified paper conservationist so we all benefitted from his knowledge. I’ve raided my paper stash, re-sorted and have some sized to print.
- Printing with or without a press: What a minefield print press settings are. Tony spent the two days showing, explaining, refining, changing pressure and moving between the three presses we had available. He then showed us how to print without a press. He applied inks to an acetate plate, overlaid his dampened paper and started to softly roll over the back of the paper. He increased the pressure and worked for a period of time. The results were poor – actually terrible.
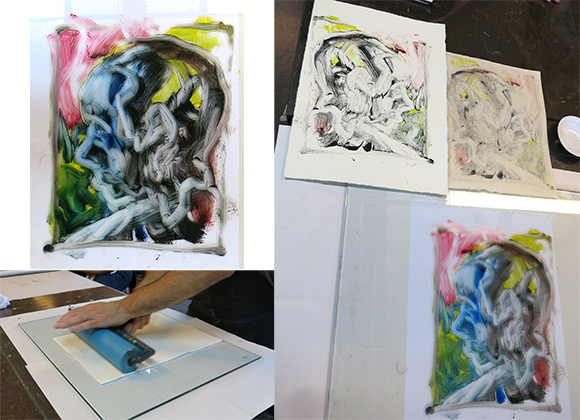 Top left: inked acetate plate. Bottom left: rolling over the paper. Right: 1st print, ghost copy and ink remaining on print plate.
Whilst everyone else was disappointed in the outcomes I was rather satisfied. It proved to me that pressure is a serious aspect and no matter what else you get right you aren’t going to get better than ‘salt and pepper’ prints without a lot of pressure. I have a student print press, not very large but perfectly adequate. I now find that I haven’t had it set up correctly – a product manual with the printer would have been helpful instead of just an empty box. Tony went through how to calibrate a printer for different outcomes and when using different types of print plates, i.e. acetate, perspex, lino, wood block or whatever. So I’ve prepared my ‘layers’ and will now work out the pressure I need for lino printing.
With all this new knowledge and with my fingers firmly crossed I’ve decided to go back to project 6 and try reprinting my images before continuing on through project 7. This will set me back some time but I’d really like to have good quality prints throughout this assignment.
This learning-log entry has cleared my mind and produced a written record of what I’ve learned over the last few days which I can refer back to. If it helps any of my classmates to improve their printing that can only be another benefit.
….. and finally

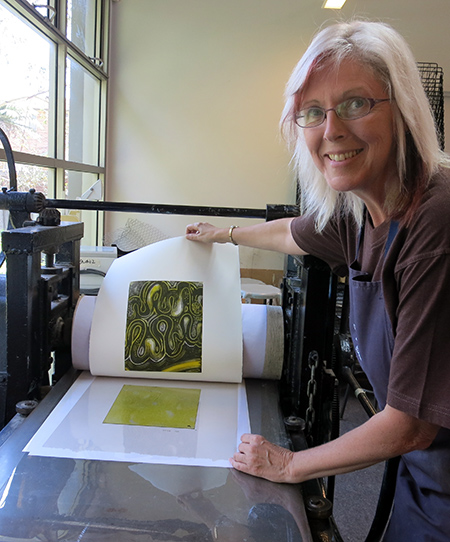
I am not sure if you follow this blog, https://lindacotestudio.wordpress.com/ ,but she is a printmaker who shares her process. She is also a very nice person who might have tips for you. I thought I would share in case it was of interest.
Thanks Deb. I wasn’t following her but am now!
Finally I’m getting some better results. Your damp paper tip a while ago was good and that’s working now I have the correct paper. I’ve learned so much in the last week.
Well done Claire. What a difference it makes to have someone with the knowledge who is able to talk to you and demonstrate in front of you.. Looking forward to seeing the changes and spectacular results.
Hi Gail. Just seeing someone actually doing printing once you’ve had a go and know all the things that go wrong is a huge help. Tony was marvellous.
First print trials this afternoon are excellent.
Go Claire! Wonderful you have finally got some answers.
Hey Judy, I’ve managed 4 prints today with a lot of fiddling with the press to understand it. On a scale of 100% being perfect I reckon I’ve got a 90%, 85%, a 70% as I wasn’t sure about the paper and it retained too much water and finally a ghost print at about 75%. Considering I wouldn’t mark any previous lino prints above 40%-45% that’s a huge improvement. Now I need a break until tomorrow.
I LIKE the look of that smile!
Must say I have been very impressed with your perseverance throughout this whole printing process. I dont think I would ever had tackled printing without doing a hands on course. You have done wonderfully well.
It’s been a bit of a trial to say the least Jane, but this 2 day course has been a lifesaver.
Excellent and useful blog entry. I have been on quite a few workshops but no one have ever taken the time to help me understand all this.
That’s the thing Steve, I’ve also done a bit of printing before but things were prepared by the tutor and we really didn’t understand a lot of the nitty-gritty stuff so we could do it on our own. What a difference this time.
Love your blog and the work you’ve done.
Fantastic news, Claire! I am so glad it’s made such a difference. Really looking forward to seeing your next post.
Hi Nola, things are definitely improving and I’ve got a few good prints. I’ve been working today so should have some new ones up by tomorrow evening I hope.
thanks for sharing what you learned. can’t wait to see the new prints. that last pic looks great –kath
Pingback: Monoprinting workshop | TactualTextiles