I thoroughly enjoyed this 2 day workshop and am thrilled with the books I made. The course was aimed at both beginners and those with some book-making experience wanting to widen their range of binding skills.
We covered four types of books:
Codex book
What an utter treat! Never did I imagine that I would be able to make a REAL book. I mean, one with a hard cover throughout, spine included. Liz was very smart – she got us to learn the hardest one first and it took the best part of the first day.
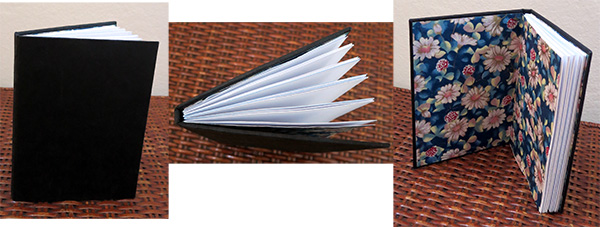 The outer structure of the book is made using board in 3 parts: the front, back and the spine. These are encased together as one in a chosen paper. Liz showed us a smart way of measuring the distance each board had to be from the next one so that the book would close properly.
Folded paper signatures (called pamphlets by Liz) were made and stitched together . This creates a very robust inner set of pages fixed top and bottom to adjacent signatures.
The signatures are attached to the cover by an inner leaf (in my case decorative Washi paper) which can be seen in my photo above. The hardest part of this was ensuring the inner leaf was laid exactly correctly in place once the glue is applied. Next time I’ll do this slightly differently – I won’t use PVA but probably a rice glue instead and I’ll apply the glue in small areas at a time whilst I lie the paper in place. This way it can be adjusted more easily than if the whole area is sticky and stretching from wet glue.
Japanese stab stitching with imperial corners
This is a brilliant book. We only made a very simple sample but the scope to develop this is huge. This technique is used when you wish to attach single sheets together. All of the book-making I’ve done to date has been attaching folded sheets through the centre to others so this is something completely new and opens up other possibilities.
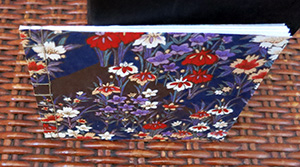 Looking at the book from the top you can see that the pages don’t fold at the spine and that the cover sits only on the front and back and is exactly the same size as the pages. Liz suggested we use a very lightweight cover for this sample whilst learning the stitching technique.
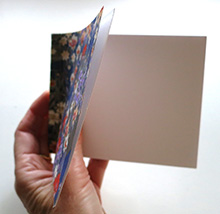
 The decorative stitching sits along the length and about 1cm in from the edge of the cover and pages and this means the book doesn’t fully open to the spine.
It’s a lovely little thing and you might just be able to spot the additional stitched square in the top and bottom corner, forming the imperial corner. A more complex version of this booklet can be made using 2 x hard covers slightly reminiscent of a Codex book but with a side spine.
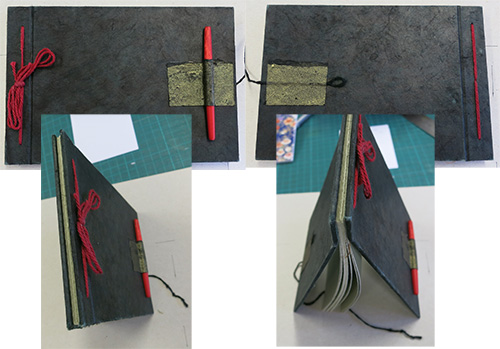 How good is the one above, made by Liz Powell, using a different type of stitching but similar cover style! Just got to make one of those myself now.
Pamphlet Stitch book
Remember the OCA printing course I’ve just finished? Remember all those failed prints, proofs and discarded prints? Remember that I cut a lot of them up and made new paper (click here and here)? Well, now they’ve been recycled into a completely new form ready to be used again. A brand new book to fill.
Pamphlet stitch can be done using a continuous length of thread to attach many signatures to a semi-soft spine in one go or alternatively shorter thread lengths will attach individual signatures to the spine. I decided to go with the short length option (and 3 signatures) and include a book mark using the same linen thread.
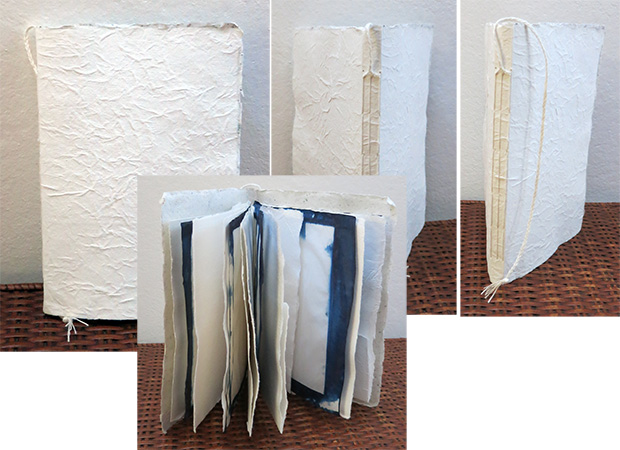 Both the cover and the majority of the inner pages are made from my recycled prints or the plain paper that surrounded my prints, once pulped and reformed into new sheets. The blue edged pages are waste pieces of greaseproof paper used as a resist when indigo dyeing with my friend Judy. Whilst dyeing some paper for a book I wanted some of the colour to slip through the crinkled greaseproof and stain each sheet with horizontal patterning. I couldn’t bring myself to throw away the greaseproof, so here it is.
The pages are different sizes with scope to add more later. There are also some sheets folded to form pockets and I’ll be stitching on these and inserting some items. This book is going to be the record of my 2016 ContextArt journey where I also printed with Seraphina (prev blog post). I’ll be inserting some of those prints into this book as a memento.
Combination book encompassing concertina folds, pamphlet stitch and a Codex cover
The last book of this course. What a beauty and what fun it was to make. I chose to have a second go at the Codex cover, add a semi-attached concertina insert and stitch small signatures into the ‘troughs’ of the concertina.
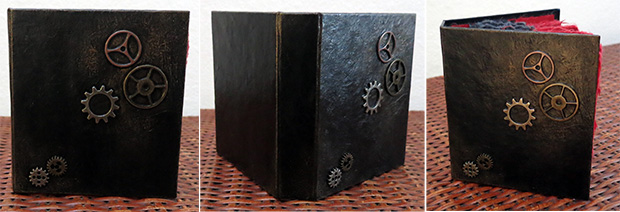 The cover has had metal cogs adhered and gold Rub N Buff applied to the paper in selected areas. The entire surface has then been coated with several layers of gloss varnish.
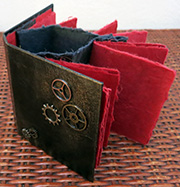 The inner concertina was attached around 1.5cm away from the spine so there is an interesting gap between the back of the book and the inner filling. Once opened the signatures can sit forward forming a multi-dimensional book.
The paper used is a type of Kozo and was torn to size, which formed a slightly furry edging to the concertina and the signatures.
 It was an excellent workshop, a very accomplished and friendly tutor, and stimulated and lively classmates who were definitely out to give everything a go.
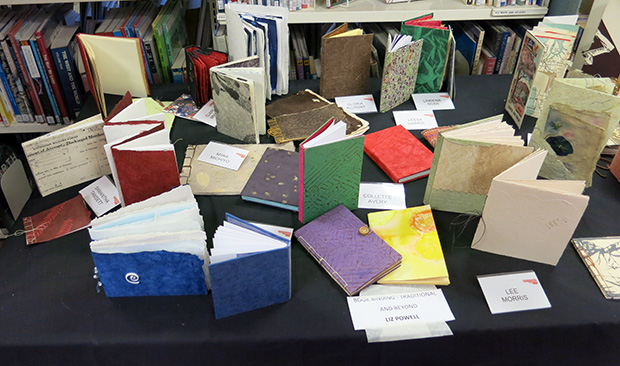 Our display at the end shows a great variety of outcomes, and I’ll be making more paper soon from my pulped excess prints so I can continue recycling them into new books and printing paper.

Lovely post – Just what I needed to get me fired up for tomorrow when I go to a mini workshop on coptic stiched books. 🙂 I think making our own books will come SO handy. I like the japanese one -would love to try it one day.
Coptic stitched books – love them. Liz told us, in our class, that there are about 30 different ways to do Coptic stitch and you can make beautiful chain stitches up the spine as well as patterning across the front and back hard covers. I’ve done it once but really should have another go before I forget the method I was shown. Apparently different versions use different numbers of needles to produce the effects. Sounds like something you could spend a lot of time exploring.
Enjoy your workshop and post the results so we can share.
What a great time you had! I see what you mean about the imperial corners – it’s a nice finish, isn’t it? I remember being taught to make a variation of the Japanese stab stitching book that incorporated a separate loose spine, which was stitched in at the same time, but I’ve long since forgotten how it was done. They’re all beautiful books.
Shall we make one each together? I’m dying to make one with a hinged front and back.
You bet! I really must start a list! You had some books for us to use as an altered book structure for our creative days too. So much to do, so little time!
Pingback: Chine collé – The final outcome | TactualTextiles