Experimental mark-making on lino.
In this project I’m experimenting with unusual items to create cuts, scratches and texture on lino. Hopefully some of these marks will result in more random outcomes than the linework formed using the regular cutters.
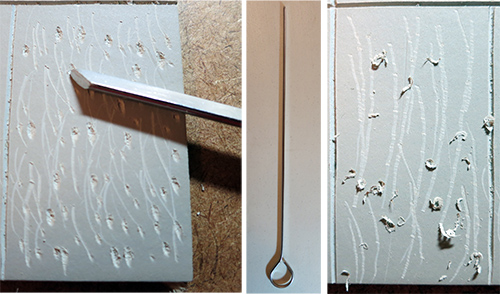 Left: digging metal skewer into lino, pushing away from me. Right: scraping the skewer over the surface towards me.
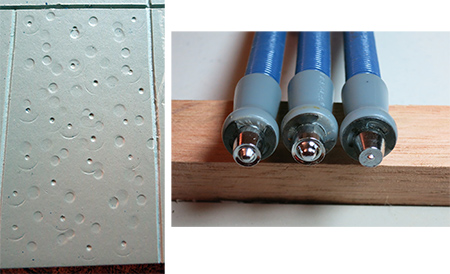 These tools spread eyelets once they have been inserted into holes, so attaching them. The three different sizes relate to the various eyelet sizes and have given quite different effects. The larger the punched end the shallower the mark on the lino. After all, they are not cutting, only compressing the lino. I like the markings and hope they print reasonably well, but they are laborious to do and make a lot of noise as the spring punch hits the lino.
The other end of the tools cut holes in paper to produce the eyelet hole for insertion. I had hoped they would cut circles in the lino but the spring action of the tools isn’t strong enough to do this and I’m reluctant to bash them with a hammer and ruin them.
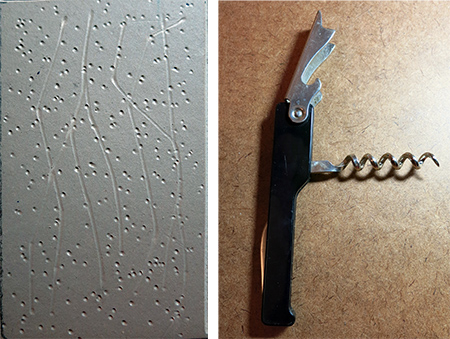 Here I both jabbed the cork-screw into the lino and also dragged it across the surface. Very nice effect. Reminds me of wattle and would give a decent background foliage appearance to a cut lino scene. Yes, I like this.
The bottle opener was a complete dead loss. For obvious reasons, it’s not sharp and wouldn’t make any marks on the lino.
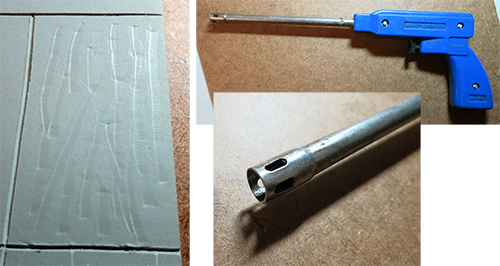 This was super-hard to do. The tool is a gas stove igniter. Again, I hoped for cut circles but got nothing at all by pushing the end into the lino. So I pushed it across the surface away from me as hard as possible. Another one that doesn’t cut but compresses the surface. Let’s see how it comes out.
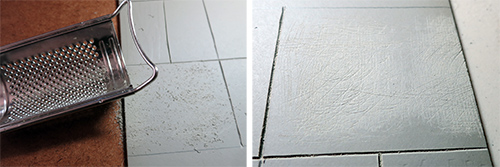 This small curved grater has scratched the surface very well and I’m hopeful of some good texture from this. the only disadvantage with it is how hard it is to control the movement and direction of the scratchings. I’ll review this after printing and, if it has worked, I’ll look at making more planned scratches (circular motion or vertical instead of random).
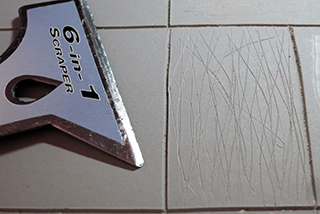 The corner edge of a paint scraper cut some very fine lines and I’m positive that this could prove to be a useful tool in future.
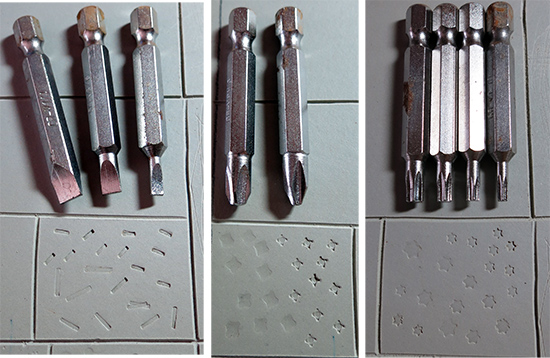 I explored most of my screwdriver bits. Left: slot bits. Middle: Phillips bits. Right: star drive bits.
Again these compress and don’t cut. I had to fit them into the screwdriver body and hit the end with a hammer several times to get the above effects. I like the straight lines of the slot bits best and think they have the most scope for use. The bigger the ends the harder to push into the lino surface. It will be interesting to see what comes out on the prints.
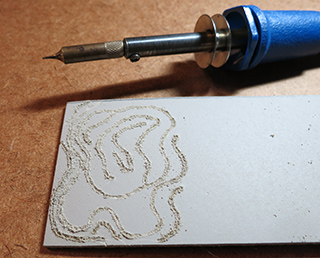 Soldering iron. I honestly thought this would be easy but it wasn’t as quick or accurate as I thought. I used a very small needle nose end as I thought it would give a narrow line, and it did. With this method the lino is not removed, as with a cutter, and so it raises the edging around the cut section – after all, the excess lino has to go somewhere. I’ve dusted away much of the loose particles but the surface is still a little raised so I’m expecting to get a line print just from these sections. This is going to be the most important print to remember KIT (Keep It Thin when using the inks) so I don’t overload the lino and lose the pattern.
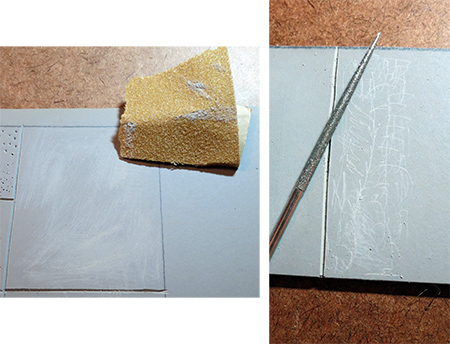 Left: very course sandpaper which has lightly scratched the surface. Right: a needle nose jewellery file. I tried to scratch with it and also drag the end across the lino. I think this could be useful in future prints.
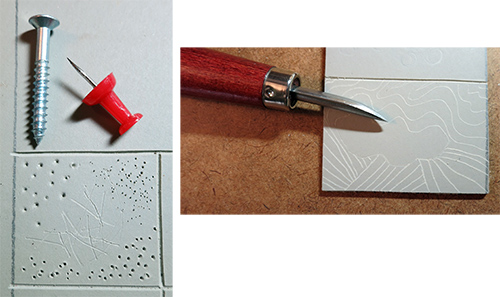 Left: push-pin and screw. The push-pin was easy. First I pushed it in fully and precisely, giving me the big holes along the bottom of the picture. Then I lightly jabbed it into the lino quickly making smaller more random holes, top right of the picture. The screw needed the hammer on it to get it in far enough to leave an indent (top left) but it scratched the surface easily enough. Right: this tool is a brayer for working with metal shim. It cuts fine lines quite easily and is fairly controllable. Yes, I could see me using this without too much of a problem.
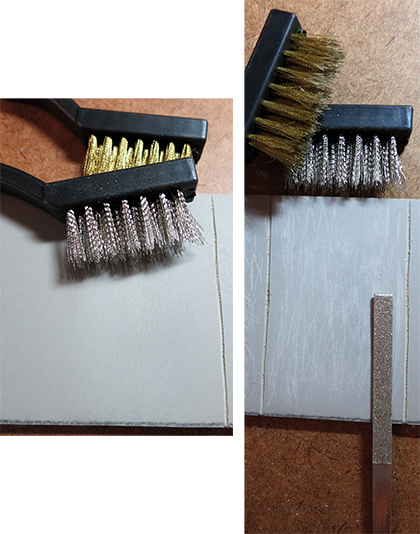 I read in the manual about trying a wire brush, so I gave it a go. They are pretty stiff but barely left a mark on the surface so I added some marks from a flat jewellers file. This both roughed the surface a little more and also added some decent scrape marks.
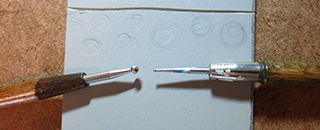 Medium and fine tipped styluses. These were pretty difficult to make indentations with. The finer tipped one worked best because it has to compress less of the surface material, but let’s see what comes out on the prints. I was determined to try to get something circular from my experiments.
I have some narrow saws I haven’t used yet. Scissors, craft knives, forks and an awl are possibilities as well. However, I’ll start by printing these samples and then review.

Looking forward to seeing how these different textures print up. They look really interesting.
First print run is drying so the post should be up tomorrow, Liz. Some intriguing outcomes with a few disappointments. So watch this space!