A lot has happened since the preparation for this project back in January (post here) and I’ve started my design again from scratch. I’ll go back and revisit the Hobbit house image later perhaps.
I’ve reverted to one of my favourite subject matters, circles. Over the years I’ve looked at circles many times, with a variety of media, but this is my first printing exploration.
I cut four pieces of paper to the size I intend to print. I took each sheet and drew circles without looking at the others already done – this was done during a train trip, hence the very wiggly lines. The papers were then folded in four and abutted to see what the effects would be.
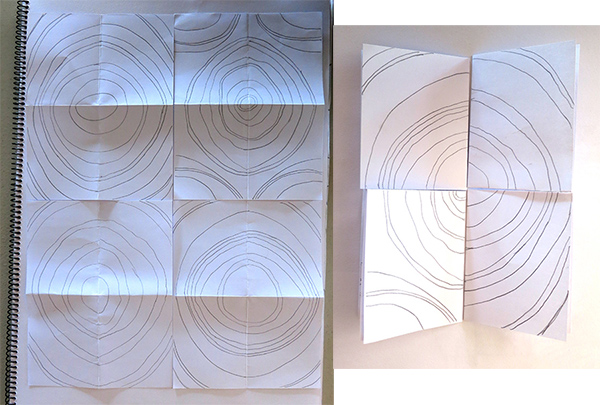 I moved the pieces around, choosing different quadrants, until I found a result that I wanted to work with.
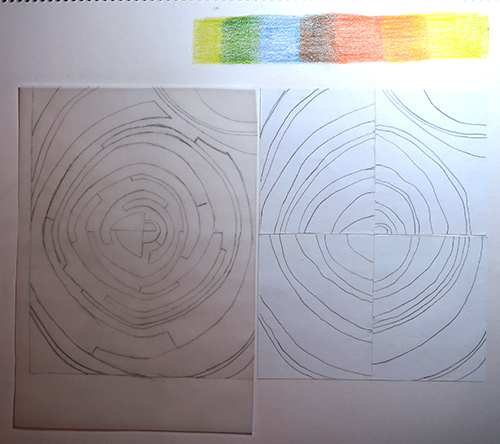 The quarters were cut and pasted in order to create the basic design. Several tracings were made, each one extending the lines differently. The aim was to eliminate the start/finish point of each quarter and produce a cohesive, continuous structure. Three print colours were chosen – yellow, orange and blue. Using coloured pencils the effects of overlapping each was explored.
The chosen traced image was transferred to paper and photocopied several times. Colours were then trialed on each copy until a uniform design was achieved, and a sample of printing inks was mixed.
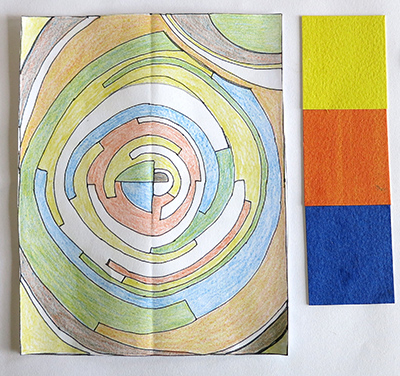
 A new tracing was made listing in every section which colour (by first letter y, o or b) was to be used in each area. Of course the lettering had to be in reverse so I could transfer them correctly on to the lino for cutting purposes.
Note: The course manual recommends to cut the first lino, ink it up, print onto a sheet of paper, then lie this printed image over a new piece of lino and transfer a ghost print to the second lino piece. This would enable the cutter to see exactly where the first layer has printed enabling accurate cutting of the second piece. The same process would then be used to cut the third piece.
Sounds like a great way to make an accurate transfer. However, I have a couple of questions. As I’m using oil based products, once the transfer has been made to the second lino piece I’m guessing I have to wait for the ink to dry before being able to cut this piece, otherwise the process has been wasted because of smudging when cutting. A right mess would be created. When dried onto the lino, would I then be able to remove this ink once the cutting has been done?
Perhaps the course writers are indicating that the transfer is made then drawn around with permanent marker immediately, with the ink being removed straight after the marker lines are in place. That’s a possibility I suppose.
Either way, I wasn’t sure so I went ahead with my traced design and drew it independently onto the three lino pieces and cut where appropriate. We’ll soon see how accurate that method is.
Once transferred I cut the blocks and printed a single layer of each on newsprint.
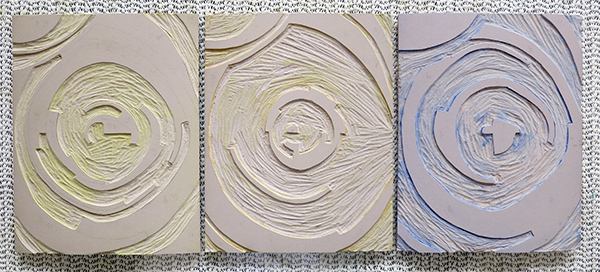
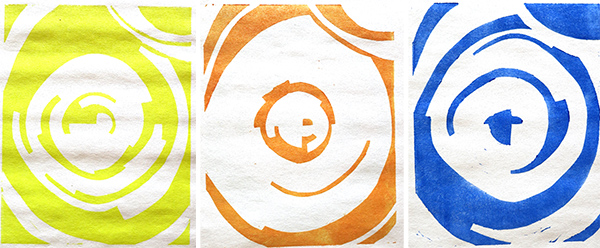 The yellow was with my new Japanese Parc roller but the others were with my old cheap rollers, and the difference in coverage is clearly evident. All three colours are mixed 50%-50% with extender medium and this product simply sticks to the cheap rollers and won’t transfer evenly to the lino. It took around 10 minutes to apply the blue mix to the lino block and it still hasn’t covered properly. Good thing my two new rollers have just arrived and I can put the others aside.
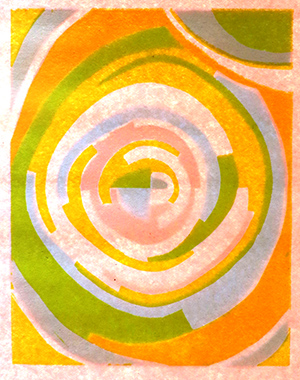 To test my cutting and (future) layering success I overlaid the three prints on my light-box.
Whilst quite a bit of colour distortion is evident from the paper layering, the backlight, and the greyish tinge to the paper itself, it does give a reasonable indication of the positioning I should be able to achieve. The placement of colours at the very least.
Overall it’s not looking too bad at this point, just need to ensure I achieve accurate registration for the multiple layer prints.
