
Project:
Elian’s Dream: Flight Race
This project started with an aluminium plate measuring 40x30cm. It was polished, covered in liquid hard ground and the outline design was transferred using red oxide*.
*Red oxide method:
- Draw design in reverse onto standard white paper. I use photocopy paper.
- Take a clean smooth cloth and make a pad with it. Dip it into metholated spirits then lightly into red oxide powder (available from hardware stores).
- Rub this across the reverse side of the paper – the side without the design – covering it in the red mix.
- Allow to dry, which takes only a few seconds.
- Place this paper, red oxide side down (design side up, obviously), onto the ground covered metal plate.
- Lightly draw over the design lines and these will transfer directly onto the surface of the hard ground.
- Remove the design sheet and using an etching needle incise the design into the ground. It’s now ready to be etched.
My design has a lot of sky and I know from experience if I apply ink to the whole plate before rubbing back I’ll get a light even plate tone across the surface. My goal is to achieve a more uneven appearance so, with that in mind, I only applied ink, using a small piece of mountboard as my spreader, to the etched objects and their immediate surrounding.
While blending this ink into the etched areas I allowed it to loosely spread to the un-inked sky sections so I would get some variegated tone across those areas.

My first attempt has a coupe of issues but the basis of what I’m looking for is there.
Just above the finish sign, between the balloons, there are a couple of marks. Although I wore gloves when handling the tarlatan I think my nails caught the surface and wiped away the ink causing these 2 lines. Luckily the plate wasn’t damaged!
There are 2 half-moon marks above the buildings which shouldn’t be there. Two reasons for these: Firstly, I was wiping in a semi-circular movement before realising that gently wiping in a horizontal manner would be more appropriate. So these marks directly demonstrate how important wiping is to the final outcome – that’s tip number 1.
Secondly, I was using a new piece of tarlatan. Although I ‘massaged’ it quite thoroughly (so I thought) to remove some of the size and make it softer, it obviously wasn’t enough. My tarlatan pad seems to have been a little rough and I think the edge of the pad has also helped to create these marks. Ensuring the tarlatan is well worked before applying it to the surface of the plate is tip number 2. I often soak new tarlatan for an hour or so to help it soften.
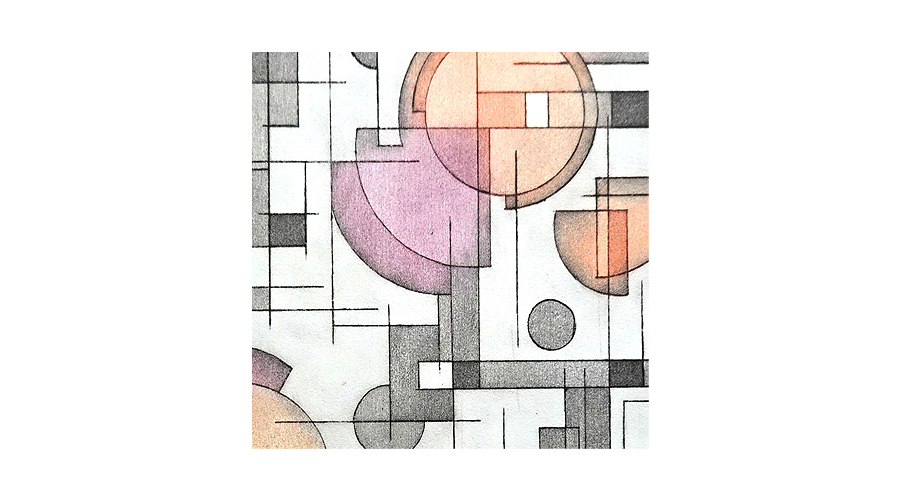
My next print achieved a much better sky result.

The plate was further worked by blocking out areas to keep them as they are before submerging the plate in copper sulphate/salt solution to achieve tonal areas where the solution bit into the exposed surface. The process is described more fully HERE. This was done twice to create 2 differing tones.

I practiced hand colouring small areas on each print until I decided exactly what I wanted on the final one.
This was trimmed to size and is ready for exhibiting as part of a collaborative piece in an upcoming exhibition entitled Flights of Fancy. More on that soon.


Leave a Reply