
Further to my last post, where I started creating my new collagraph plate (without the large cut away areas), once the Mod Podge solution dried I slashed into the plate surface, glued on some thin cardboard shapes and added some gel medium pressed with a patterned fabric. The plate was then sealed with 4 layers of Shellac.
 Above: before and after Shellac.
The Shellac was interesting as it soaked into my finely cut lines, swelling the cardboard and so further defining the areas. This is particularly evident on the right hand side of the right image, top and bottom corners where the lines appear thickened.
 The carborundum sat well within the Mod Podge but, once dry, it seemed to have sunk to the bottom of the solution and the surface wasn’t really as rough as I’d hoped.
Once the Shellac was brushed over the plate as well I wasn’t sure if I’d get any texture in these areas on my prints at all. It was a case of fingers crossed and just give it a go.
Trial 1:
I started with the light-weight Chinese cotton as I need two more prints to complete my (very bright, lairy) series of lining sheets for the book.

 OK, not bad but I was correct that I’ve lost any texture I was aiming for from the carborundum.
Coverage isn’t bad for a first print but I need to push the ink into the areas surrounding the high points so I get better outline definition.
The honeycomb effect from the fabric pressed into gel medium has come out well, as have the ‘Shellac swelled’ slashes.
Trial 2:
 Great coverage. Thank heavens these coloured prints are done.
Now to the front and back inside linings, in a heavier-weight paper. My last post showed great results using damp 250gsm BFK Reeves paper. However, I’m a great fan of Stonehenge, although I know many printmakers aren’t. It’s less flexible than BFK Reeves but has a super smooth surface that I like.
Inner lining 1:
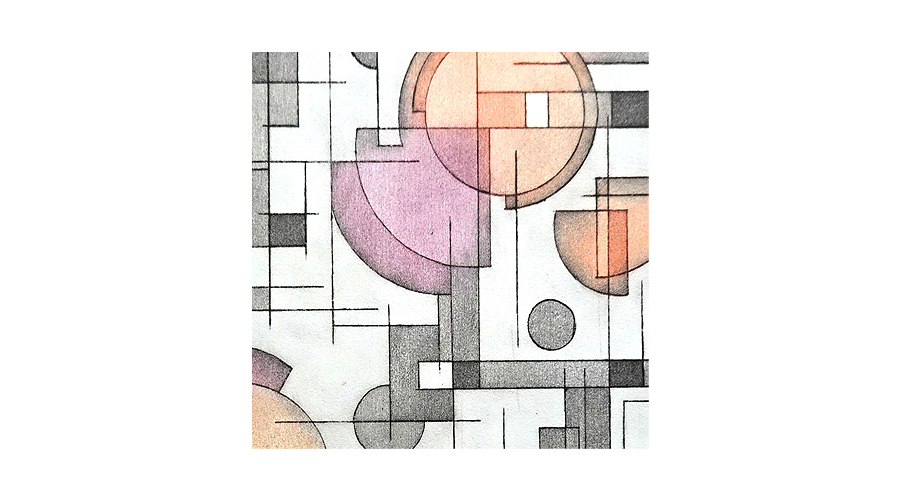
 Bone black ink + 50% extender on 250gsm damp ivory Stonehenge.
Wow, now that is gorgeous. Beautiful definition, thrilled with the result. As you can see, there is a difference in the image between this print and the previous two. That’s because this (and the next print) are on smaller pieces of paper.
Inner lining 2:
 Bone black ink + 50% extender on 250gsm damp ivory Stonehenge.
On this one I removed more of the background ink and lightly brushed telephone book paper across the entire surface. This has crisped the image and (yes!) brought out some of the carborundum texture in my piped lines.
And a full image just for me:
 Bone black ink + 50% extender on 250gsm damp ivory Stonehenge.
Great result. Printing for this project is now complete and in a week or so, when the oil based inks are nicely cured, I’ll start book assembly.
A final note: Always remember that fifth ‘P’ – perseverance. It doesn’t only relate to print-making you know.


Leave a Reply